.png)
How do I set up Textchat?
Textchat puts a chat widget on your website so visitors can message you. This guide covers how to get your embed code and install it.
1. Get your Textchat code
- Open Textchat settings (you’ll need to be logged into Chekkit).
- Under Installation Code, click View next to Textchat Code.
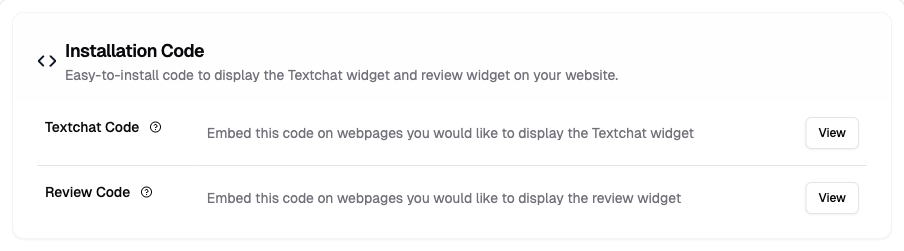
A pop-up shows your embed code and short install tips. Copy the code.
Important: The widget only loads on domains listed under Allowed Websites in Textchat settings. Add your site there if it isn’t already.
2. Install the code on your website
Paste the widget code just above the closing </body> tag on every page where you want Textchat to appear.
Jump to your platform:
WordPress
The fastest way to add Textchat site-wide is with the free Insert Headers and Footers plugin.
- Install and activate Insert Headers and Footers.
- Go to Settings → Insert Headers and Footers.
- Paste your Textchat code into Scripts in Footer.
- Save, then refresh your site to confirm the widget appears.
Wix
Wix also has official steps for custom code.
- Open your Wix site settings.
- Under Development & integrations, open Custom Code.
- Click + Add Custom Code, paste your Textchat snippet, and place it in Body - end.
- Publish your site.
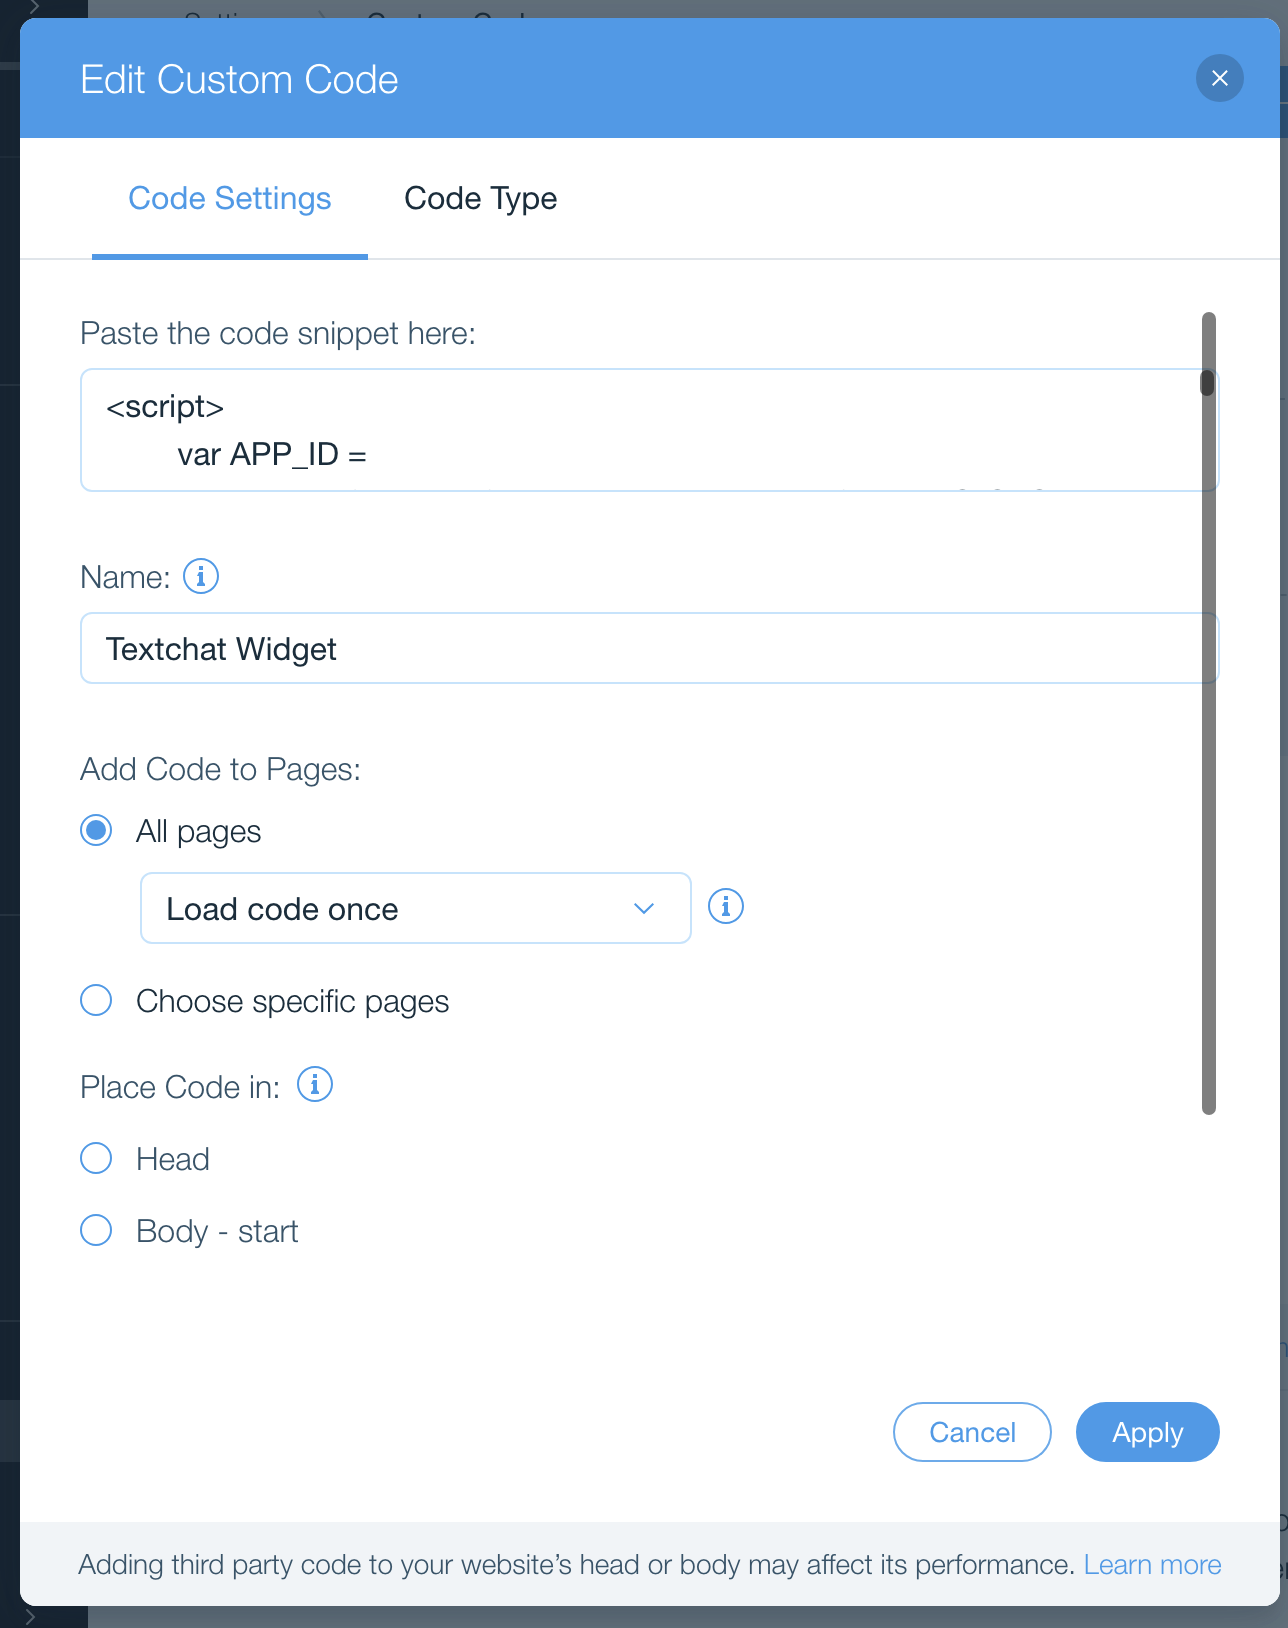
If Wix Chat is also showing, open the site editor, click the Wix Chat bubble, and delete it.
Squarespace
Squarespace also documents this under Code Injection.
- In the Home Menu, go to Settings → Advanced → Code Injection.
- Paste your Textchat code into the Footer section.
- Save and publish.
Shopify
- Go to Online Store → Themes → Edit code → Layout → theme.liquid.
- Paste your Textchat code just above the
</body>tag. - Save, then refresh your storefront.
Webflow
- Open Project Settings → Custom code.
- Paste your Textchat code into the Footer code section.
- Save, then publish your site.
GoDaddy
GoDaddy uses a slightly different embed snippet. Don’t copy a generic code block from this article — get the GoDaddy version from your dashboard:
- Open Textchat settings and click View next to Textchat Code.
- Under Website builder, choose GoDaddy, then copy the code shown there.
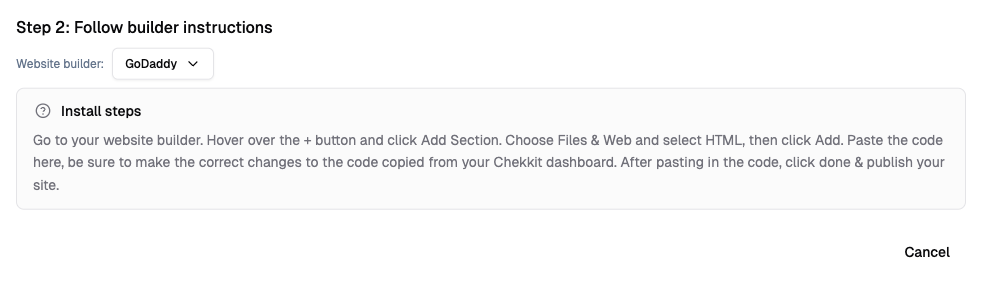
- In the GoDaddy website builder, hover over the + button and click Add Section.
- Choose Files & Web → HTML, then click Add.
- Paste the code you copied from Chekkit.
- Click Done, then publish your site.
How to remove Textchat
Any website
- Open your site’s code editor or the place you added the snippet.
- Find the Chekkit Textchat script. It usually looks like:
<script async defer src="https://chat.chekkit.io/v1/webchat.js"></script>
or includes:
window.parent.chekkitSettings = { app_id: 'YOUR APP ID' };
- Delete that entire block of code.
- Save and publish.
- Check your site in a private/incognito window to confirm the widget is gone.
By platform
- WordPress — Settings → Insert Headers and Footers (or Header & Footer Code Manager). Delete the code from Scripts in Footer and save. If you added it in theme files instead: Appearance → Theme File Editor → theme/footer.php, remove the script before
</body>. - Wix — Settings → Advanced → Custom Code. Delete the snippet that includes
chat.chekkit.ioor Chekkit, then publish. - Squarespace — Settings → Advanced → Code Injection. Remove the Chekkit script from Footer, then save and publish.
- Shopify — Online Store → Themes → Edit Code → Layout → theme.liquid. Delete the Chekkit code above
</body>and save. - Webflow — Project Settings → Custom Code. Clear the Footer Code box, save, and publish.
- GoDaddy — Edit the HTML section where you added Textchat, remove the script block, then Done → Publish.
Need help?
Email support@chekkit.io with your business name and we’ll take a look.