.png)
Connect ServiceM8 to Chekkit
Connect ServiceM8 to Chekkit to text customers automatically when jobs are quoted, booked, or completed — using ready-made automations you can turn on in a few clicks.
What it does
- Links your ServiceM8 account to Chekkit when you sign in to ServiceM8 and approve the connection, so job updates flow into your messaging automations.
- Lets you choose which job changes should send updates to Chekkit — job created, status changes, or badges added.
- Offers one-click quick-setup automations for quote follow-up, job booked confirmation, and review requests after completion.
- Lets you fine-tune any automation later from Automations → Message automations.
Before you start
- You need owner or location admin access in Chekkit.
- You need a ServiceM8 account with permission to connect apps to ServiceM8.
- For status-based automations (quotes, booked jobs, completed jobs), enable A job's status changes when you connect — it's pre-selected because all quick-setup templates use job status.
How to connect
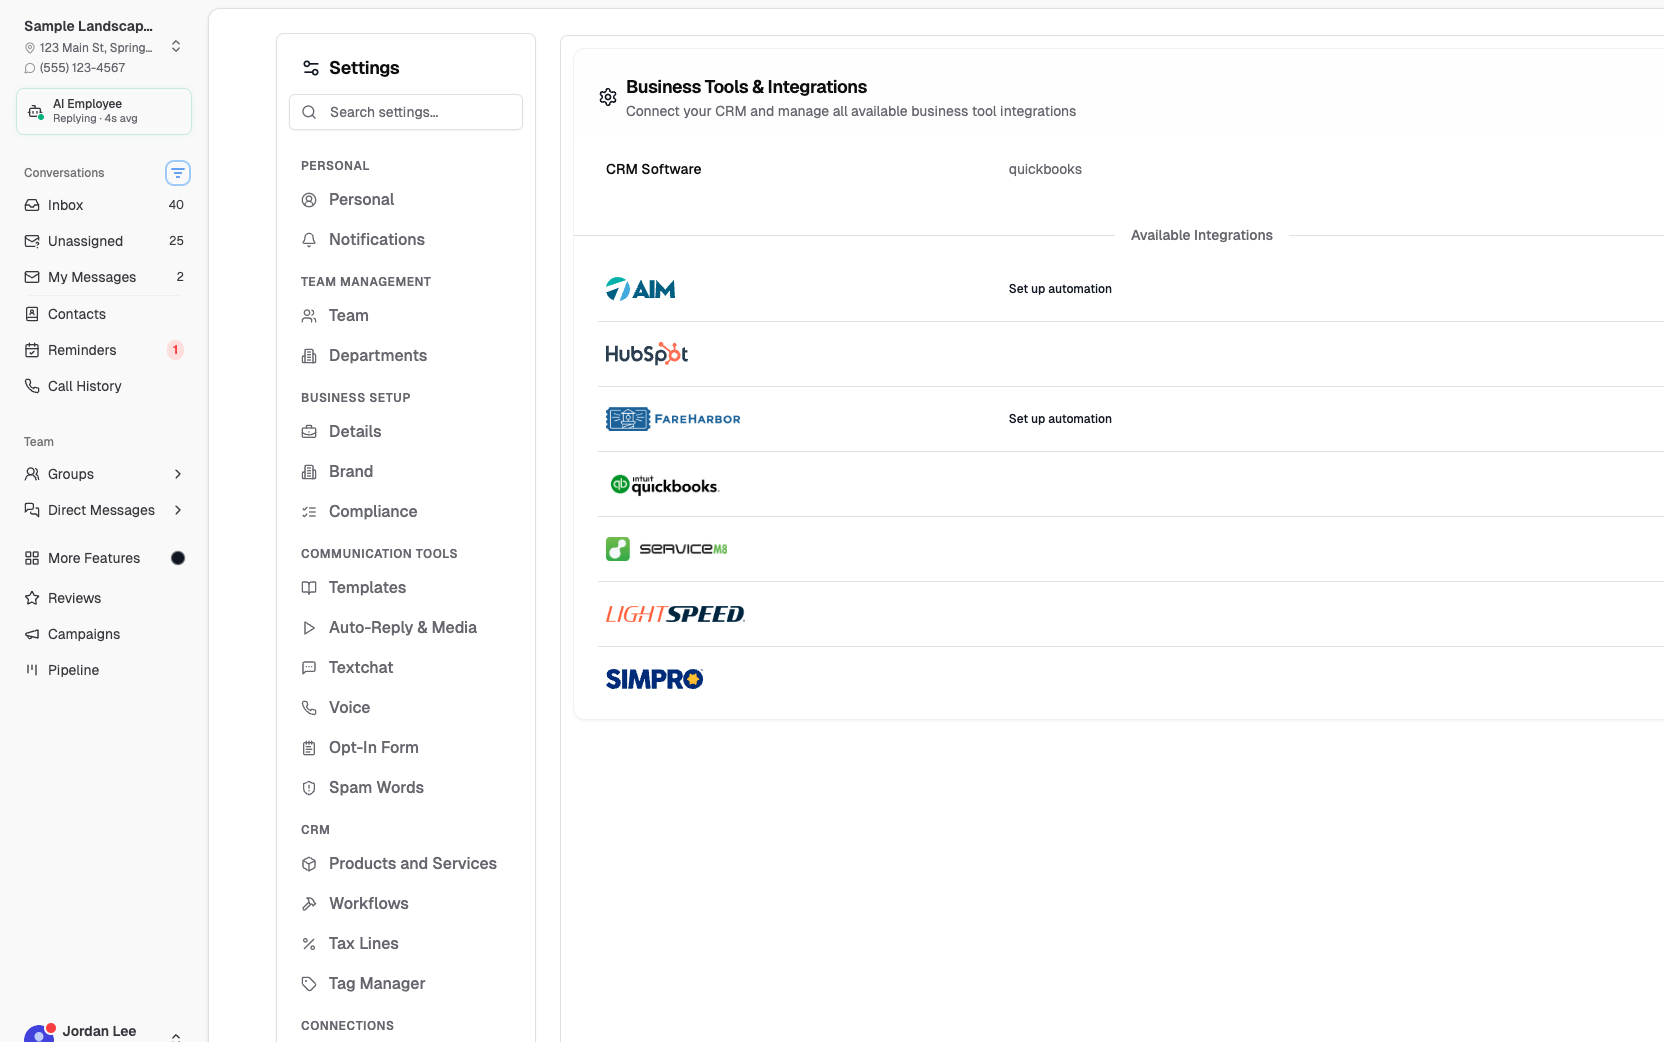
- In Chekkit, go to Settings → Connections → CRM & Tools.
- Find ServiceM8 in Business Tools & Integrations.
- Click Set up to open the connection dialog.
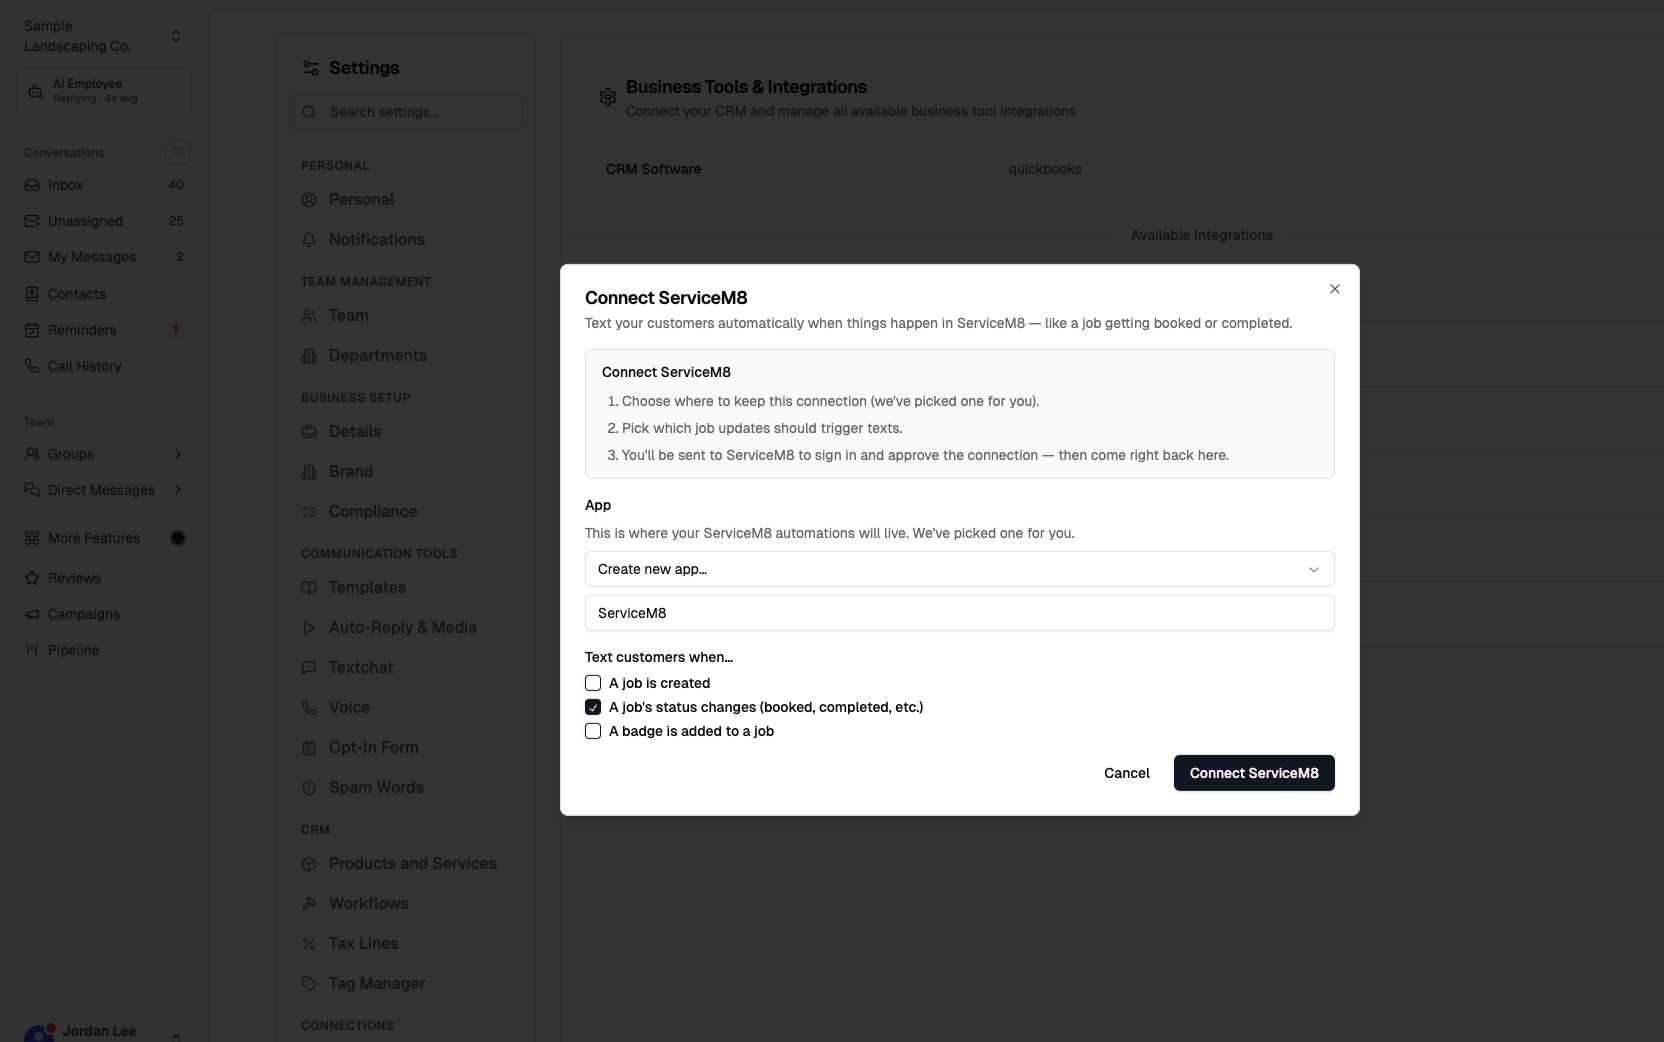
Connect ServiceM8
- Choose an app where this connection will live. Chekkit picks one for you by default; you can use an existing app or create a new one named ServiceM8.
- Under Text customers when…, select the job updates you want Chekkit to receive:
- A job is created — when a new job is added in ServiceM8.
- A job's status changes (booked, completed, etc.) — required for the quick-setup templates (Quote, Work Order, Completed).
- A badge is added to a job — optional; use if you build custom automations around badges.
- Click Connect ServiceM8. You'll be sent to ServiceM8 to sign in and approve the connection, then returned to Chekkit.
When the connection succeeds, the ServiceM8 row shows Connected.
Quick-setup automations
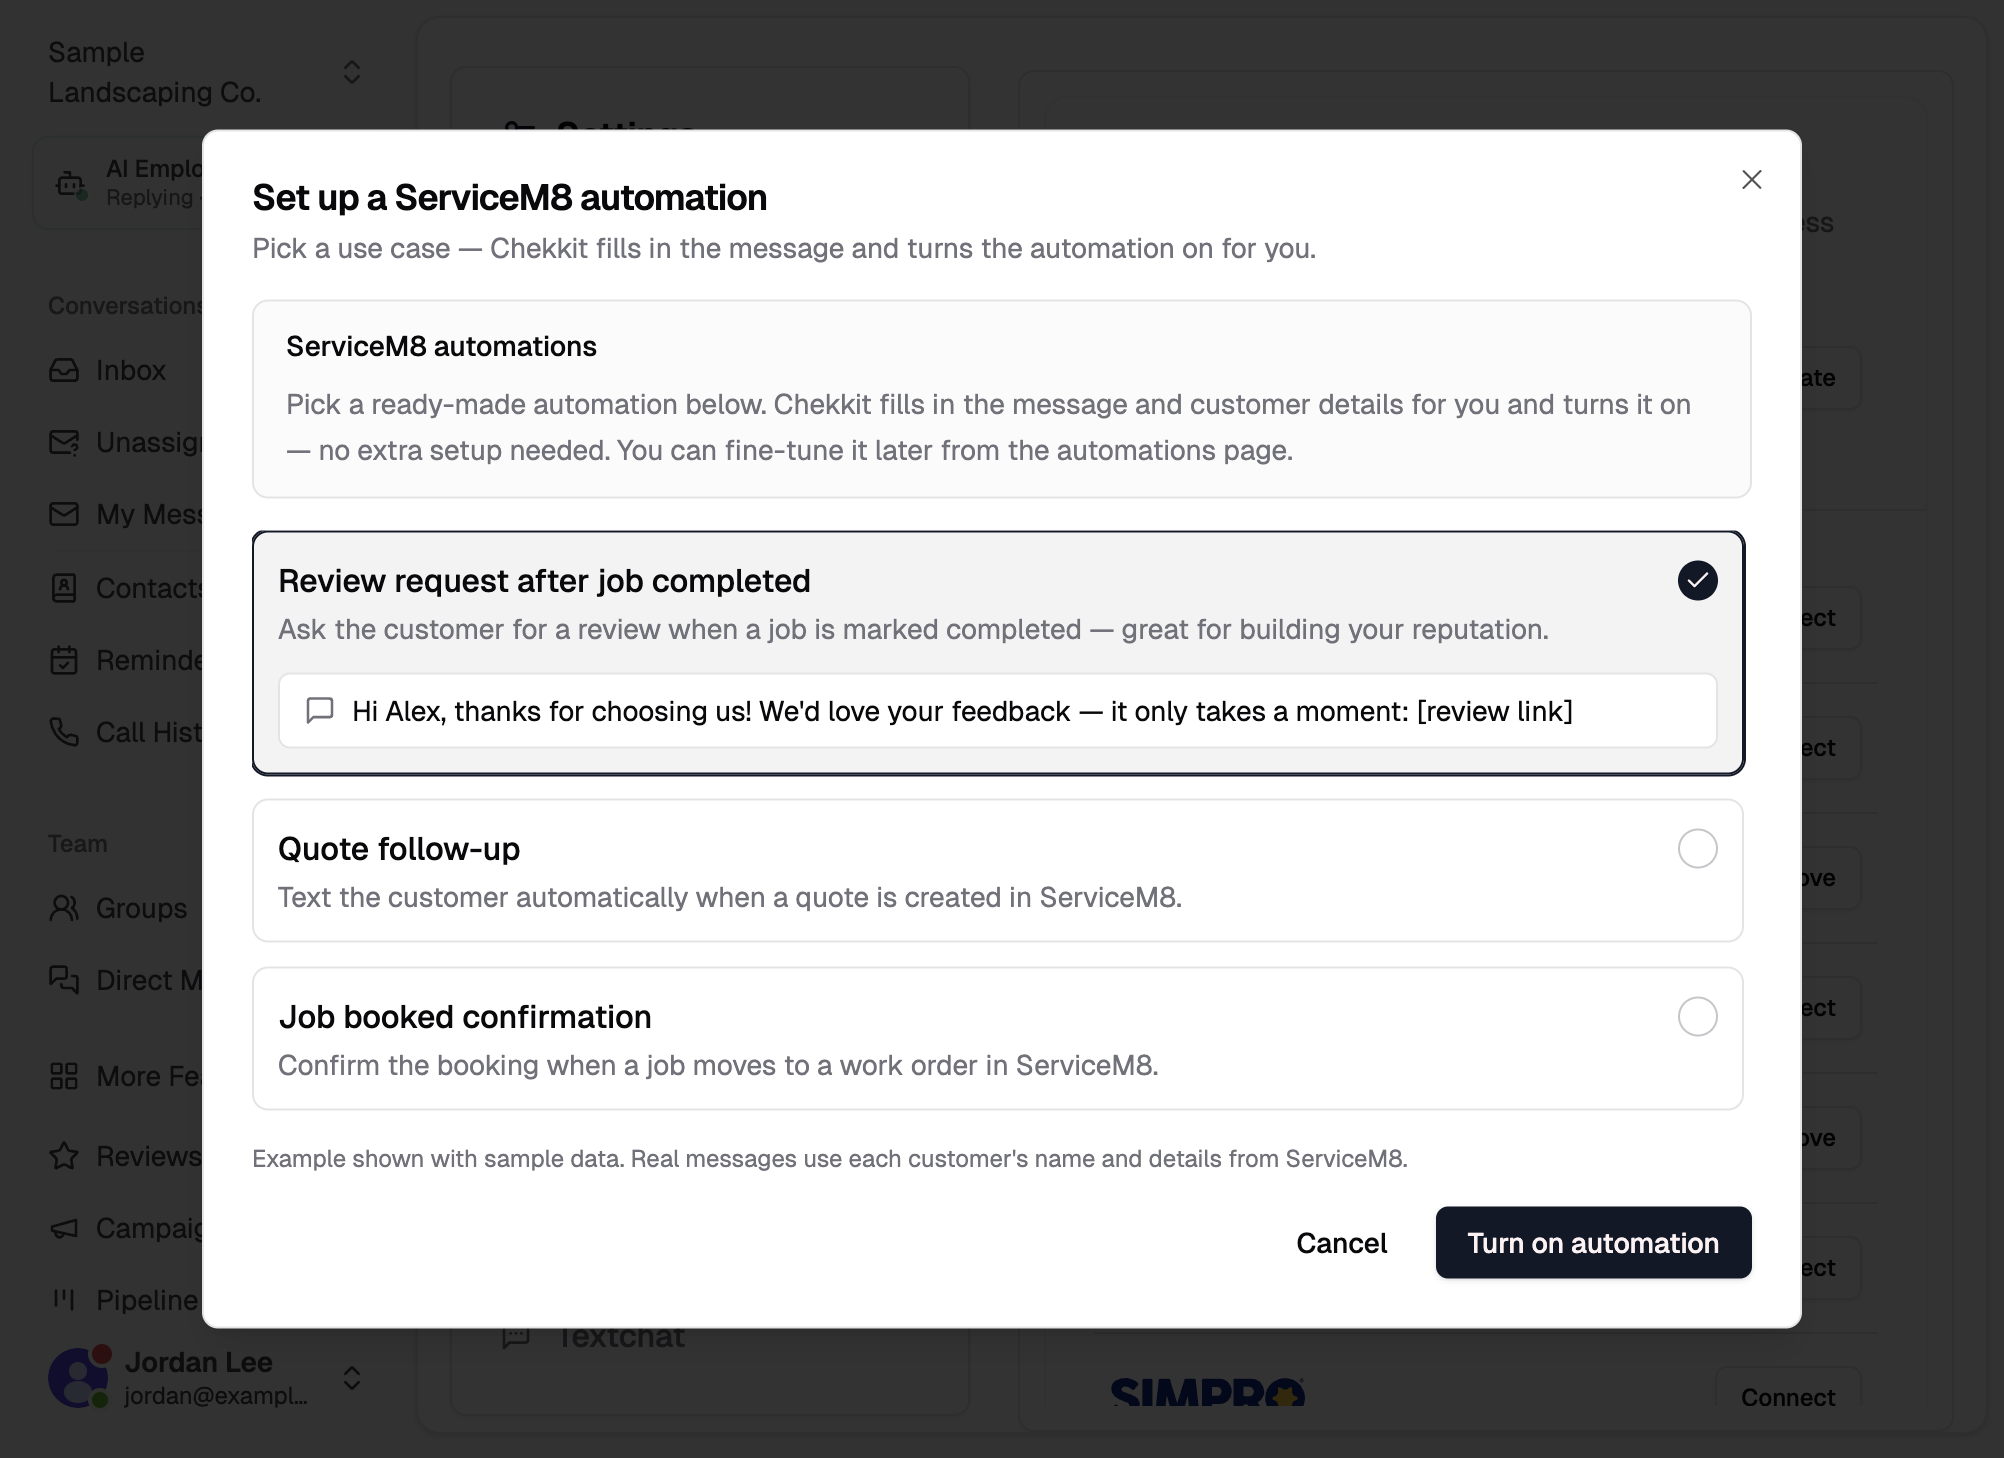
After connecting, click Set up automation (or the + button on a connected integration) to open the template picker.
| Automation | When it sends | What the customer gets |
|---|---|---|
| Review request after job completed | When a job's status changes to Completed | A thank-you and review link. |
| Quote follow-up | When a job's status is Quote | A text letting the customer know their quote is ready. |
| Job booked confirmation | When a job's status changes to Work Order | A confirmation that the job is booked. |
Example review request (with sample data):
Hi Alex, thanks for choosing GreenScape Lawn Care! We'd love your feedback — it only takes a moment: [review link]
Real messages use each customer's name and mobile number from ServiceM8 (mobile is preferred; phone is used as a fallback).
Pick a template, click Turn on automation, and Chekkit creates and activates it. You can add the remaining templates anytime; already-added ones show as Added.
After connecting
- Open Message automations from the integration row to view, edit, or pause automations.
- If an automation says it will start once ServiceM8 sends updates, change a job status in ServiceM8 to test that everything is working.
Disconnect ServiceM8
- In Business Tools & Integrations, open ServiceM8 and choose Remove.
- Confirm removal in Chekkit. Chekkit also disconnects from ServiceM8 on their side.
- Existing automations remain but will not run until ServiceM8 is connected again.
Troubleshooting
- Automations aren't firing. Make sure A job's status changes was selected when you connected. Reconnect if needed.
- Quote or booked automations never send. Confirm the job status in ServiceM8 matches what the automation expects (Quote or Work Order).
- Customers aren't receiving texts. Check that the job contact has a valid mobile number in ServiceM8.
- I want a different trigger. Duplicate or edit the automation in Message automations to match your ServiceM8 workflow.
Related articles
- How can I automatically send review invitations?
- Send Events to Chekkit Using Webhooks
- Messaging Consent
Need help?
If you're having trouble connecting ServiceM8 or setting up automations, email support@chekkit.io with your business name and a short description of the issue.