.png)
Using the Pipeline
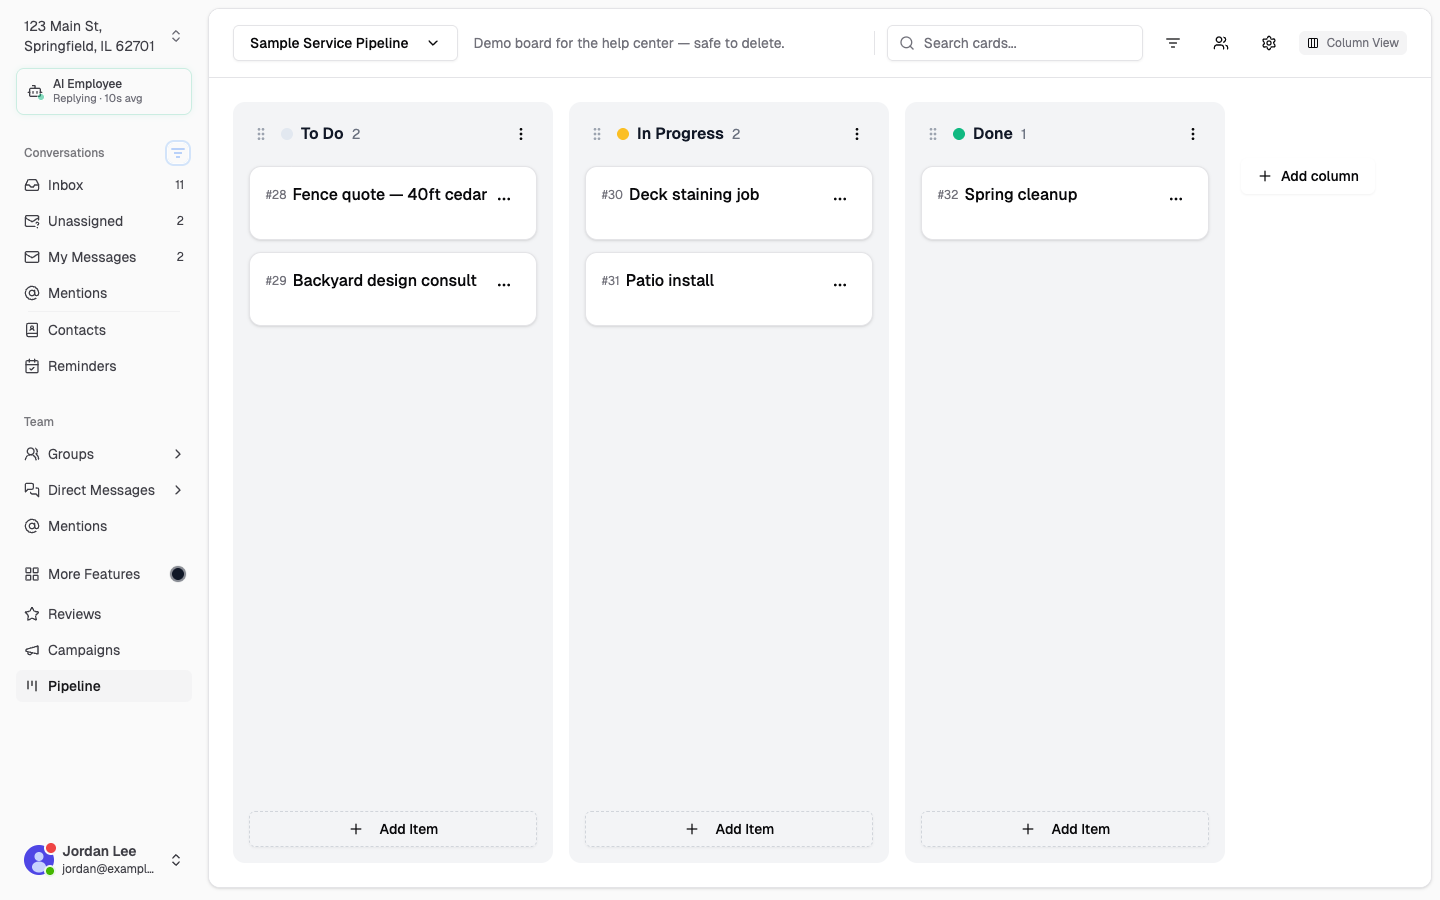
The Pipeline is a visual Kanban board for tracking your work from start to finish. Create columns for each stage, add cards, drag them across as work progresses, and let Chekkit text your customers and request reviews automatically along the way.
Open the Pipeline
From the sidebar, click Pipeline. If you haven’t created one yet, you’ll be prompted to create your first pipeline. Your view (column or table) and your filters are remembered the next time you come back.
Create a pipeline
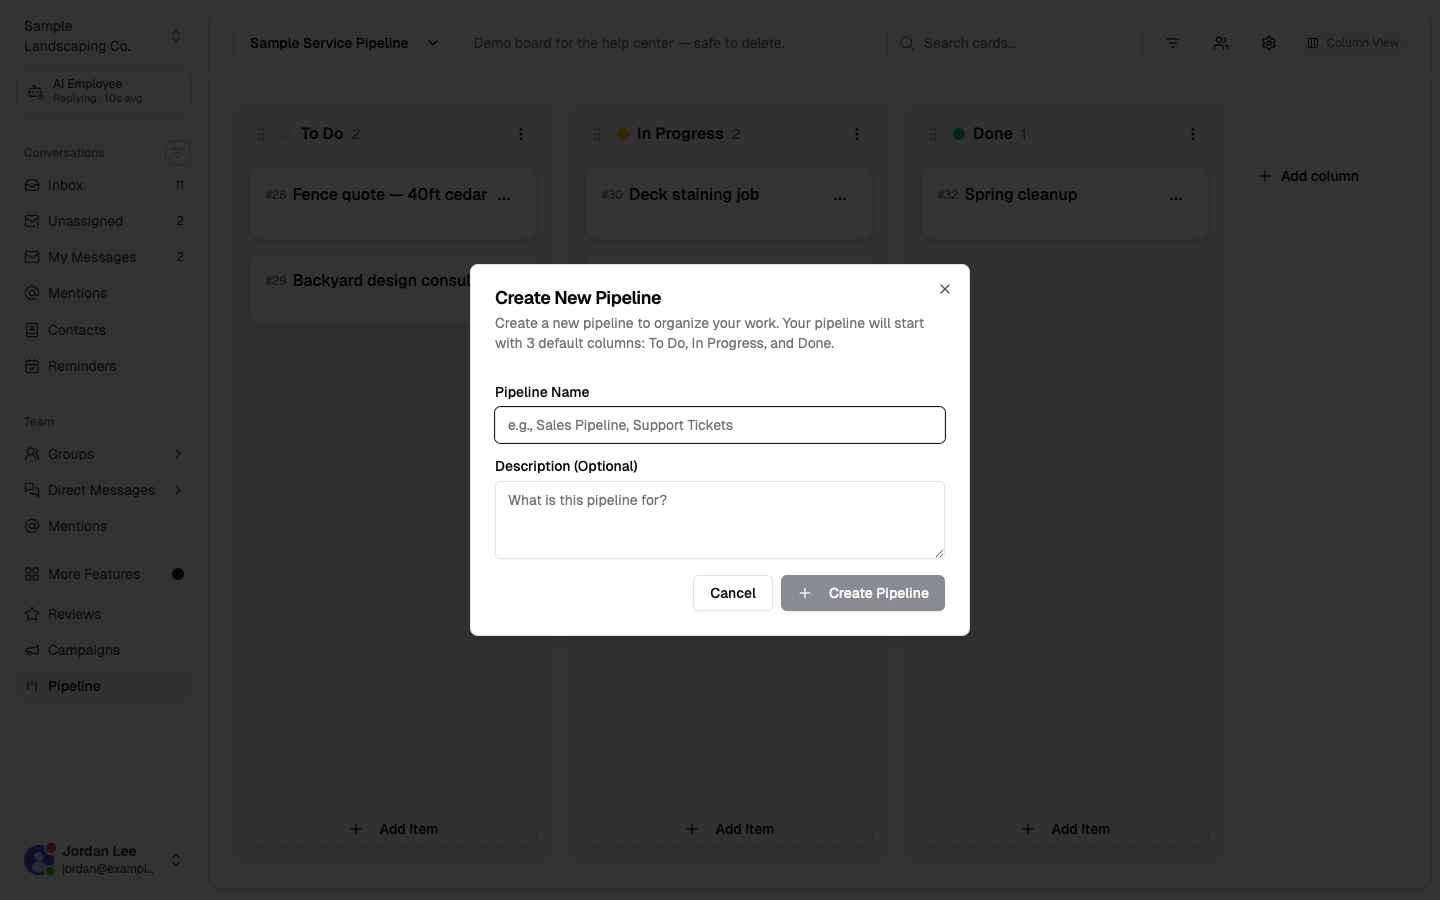
You can run as many pipelines as you need — for example a Sales Pipeline and a Service Jobs board. To create one:
- Click the pipeline name at the top left, then choose Create New Pipeline.
- Give it a name and an optional description.
- Click Create Pipeline.
Every new pipeline starts with three columns — To Do, In Progress, and Done — which you can rename or replace. Use the pipeline name dropdown at the top left any time to switch between your pipelines.
Columns (your stages)
Columns represent the stages of your process. Use the Add column button on the right of the board to create a new stage. Each column has a menu (the ⋮ icon) with options to:
- Rename Column
- Change Color — pick a color to tell stages apart at a glance
- Column Settings — set a color, an item limit, and automatic texts (see below)
- Delete Column
Drag the grip handle on a column header to reorder your stages. Set an Item Limit in Column Settings to cap how many cards a stage can hold — the count shows as 3/5 in the header and the column warns you when it’s full.
Add and move cards
Cards are the individual pieces of work — a job, a quote, a lead, or a task.
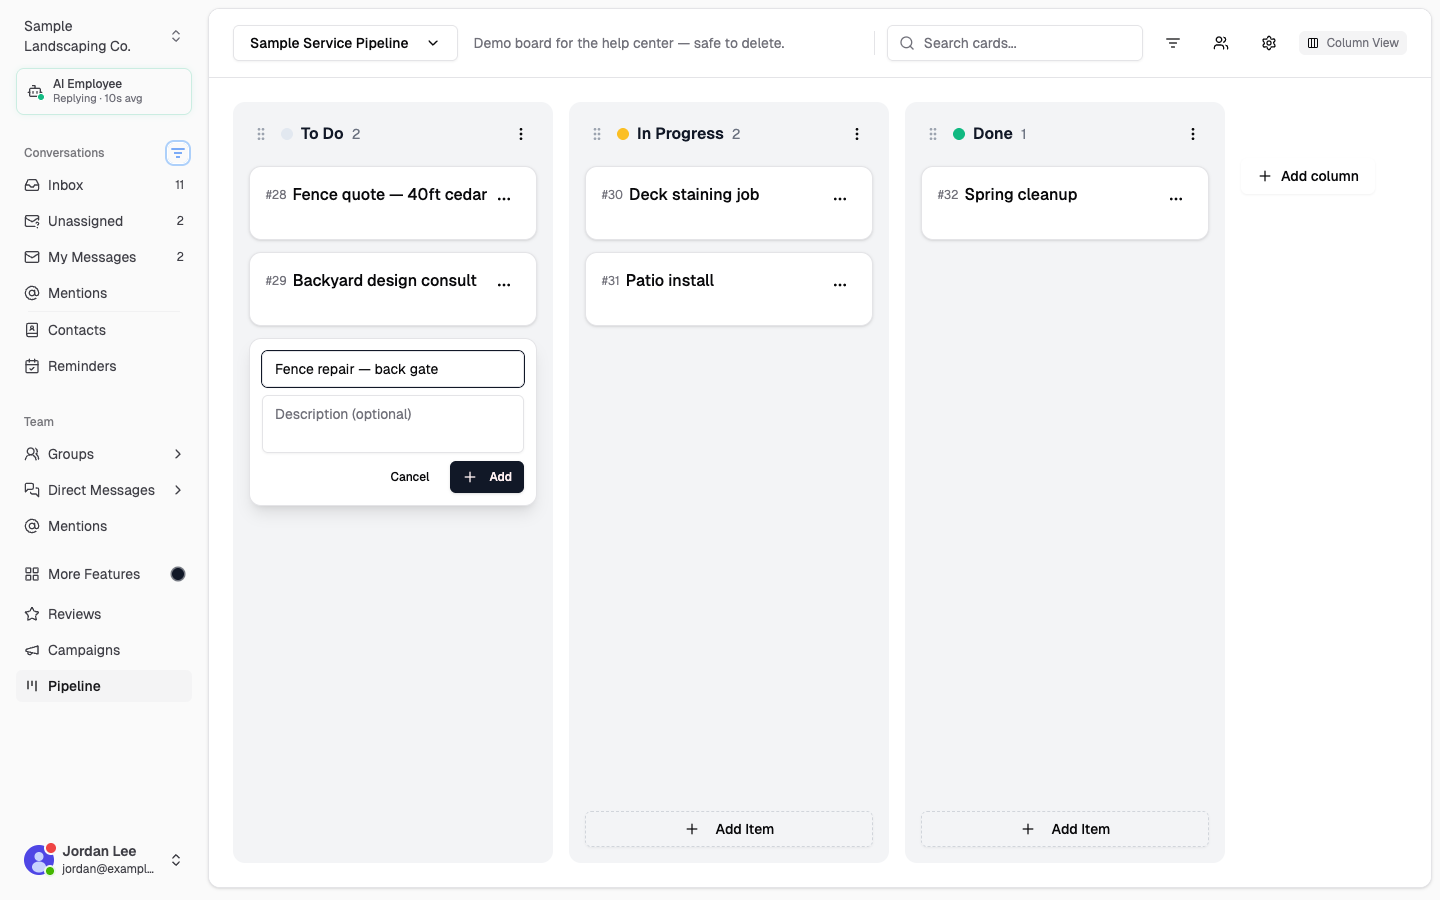
- Add a card: click Add Item at the bottom of a column, enter a name and an optional description, then click Add.
- Move a card: drag it to another column as the work progresses. You can also drag cards up and down to reorder within a column.
- Card menu (⋮): Mark Complete (or Mark Active) and Delete.
Card details
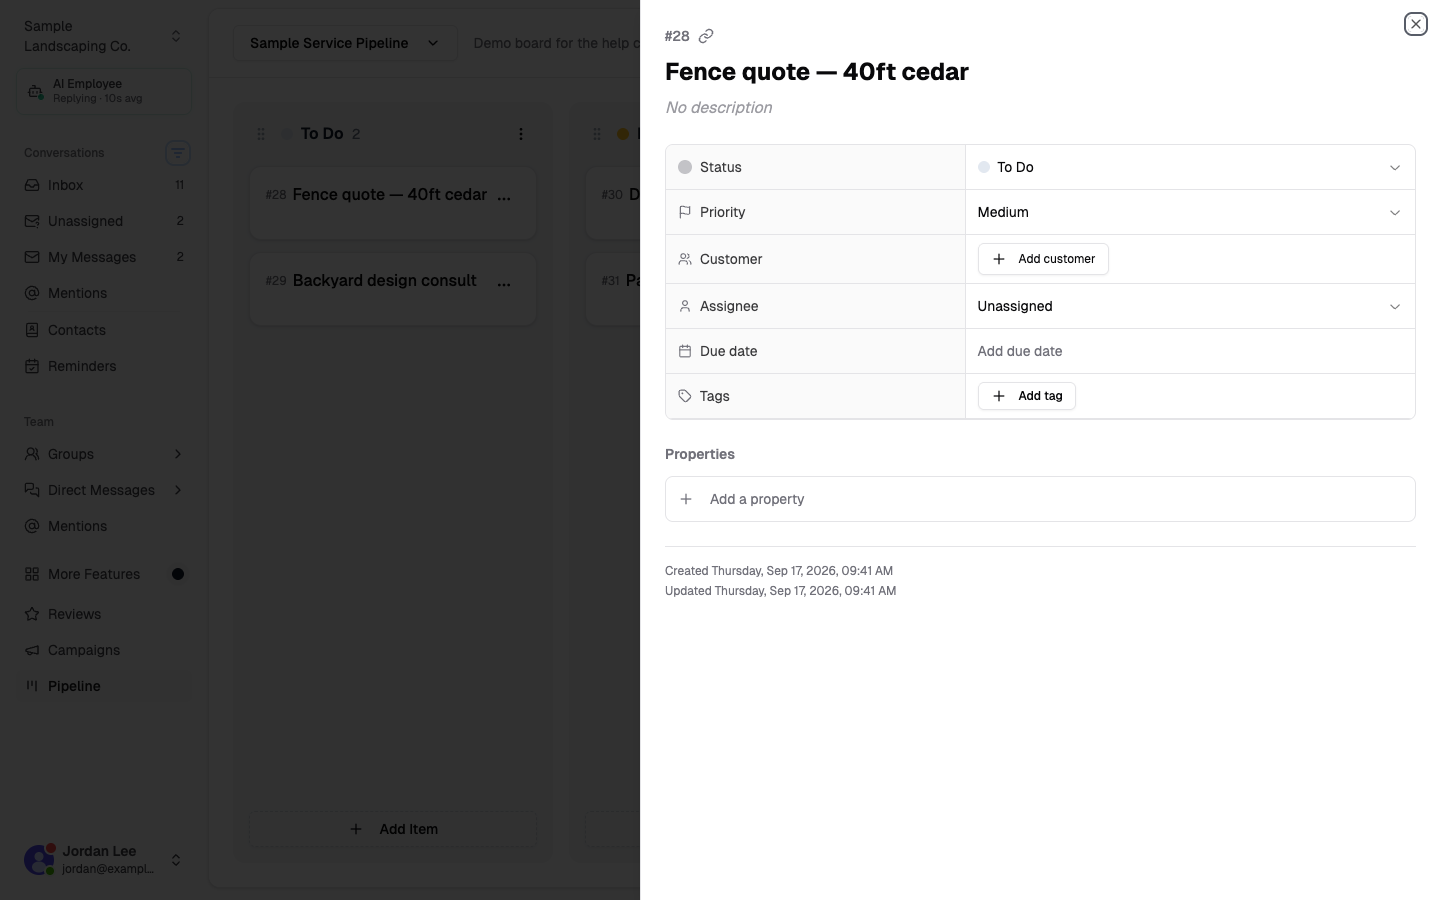
Click any card to open its detail panel on the right. From here you can:
- Attach a customer and see their contact and billing information
- Set a priority (Low, Medium, High, Urgent), a due date, an assignee, and tags
- Add custom properties (text, number, date, or checkbox fields) that fit your workflow — star a property to show it right on the card
- Leave internal team notes on the card
- Open the conversation with the customer or send a message from a template — right from the card
Each card is given a sequential ticket number (for example #1042) shown on the card and in its details.
Reading a card at a glance
Cards show small badges so you can scan a board quickly:
- Priority — High and Urgent cards are highlighted (Medium is the default and shows no badge)
- Due date — shows the date, and turns red with an Overdue label once the day has passed
- Aging — a small clock badge (e.g. 5d) shows how many days a card has sat in its current stage, turning amber then red as it ages
- Replied — the customer sent a message no one has read yet
- Texted — the customer was texted automatically when the card entered this stage
- Form — the card was created automatically from a form submission
Text customers automatically on a stage
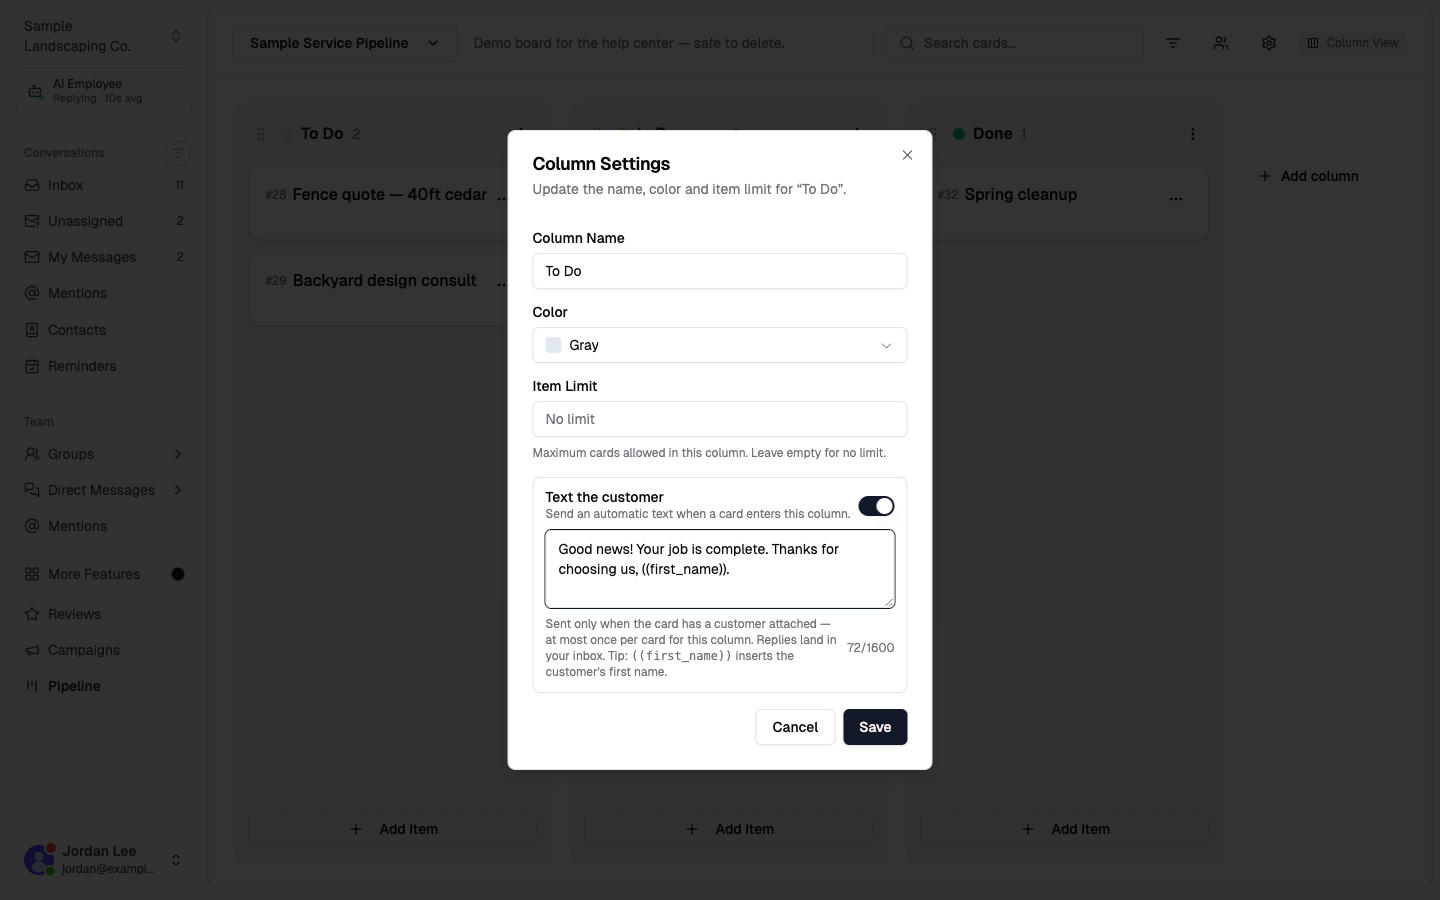
You can have Chekkit text a customer automatically whenever their card enters a stage — great for “We’ve started your job” or “Your order is ready for pickup.”
- Open a column’s menu and choose Column Settings.
- Turn on Text the customer and write your message.
- Save. A small message icon appears on the column header to show texting is on.
The text is sent only when a card that has a customer attached enters the column, at most once per card for that column. Replies land in your inbox. Tip: type ((first_name)) to insert the customer’s first name.
Request a review when a card is completed
Open the Settings (gear) menu at the top right of the board and turn on Request review on completion. When you mark a card complete, Chekkit will text that customer a review invitation automatically.
Filter and search
Use the tools at the top right of the board to focus on the right work:
- Search cards — by name, description, customer, or ticket number (type
#and the number) - Filter (funnel icon) — Awaiting reply, Priority, Due date (overdue, today, this week, none), and Tags
- Assignee (people icon) — filter by team member, including Assigned to me and Unassigned
- Show / hide completed items — from the Settings (gear) menu; completed cards are hidden by default
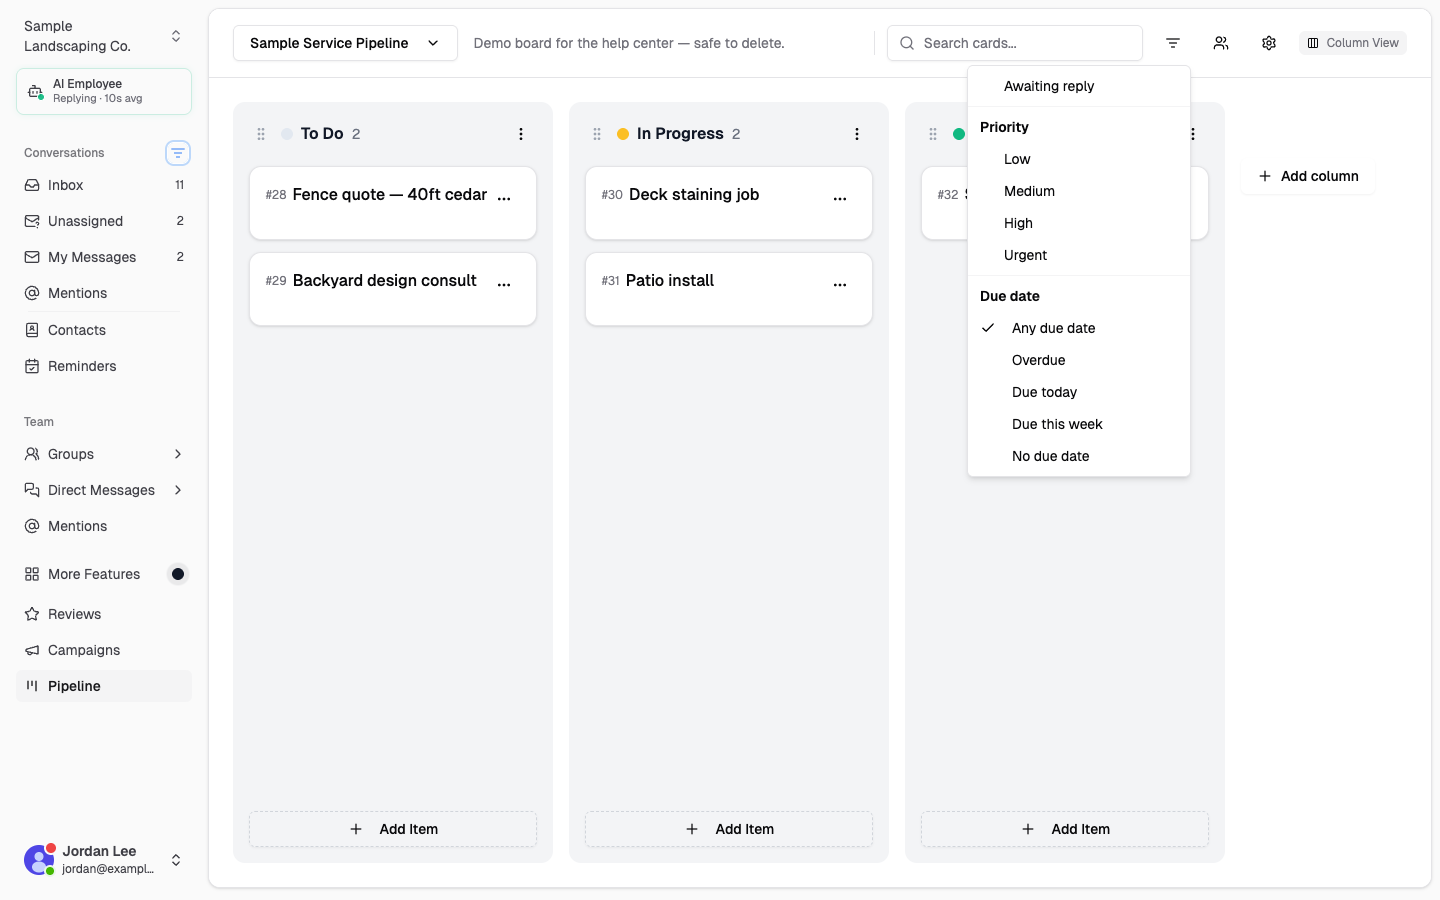
Table view
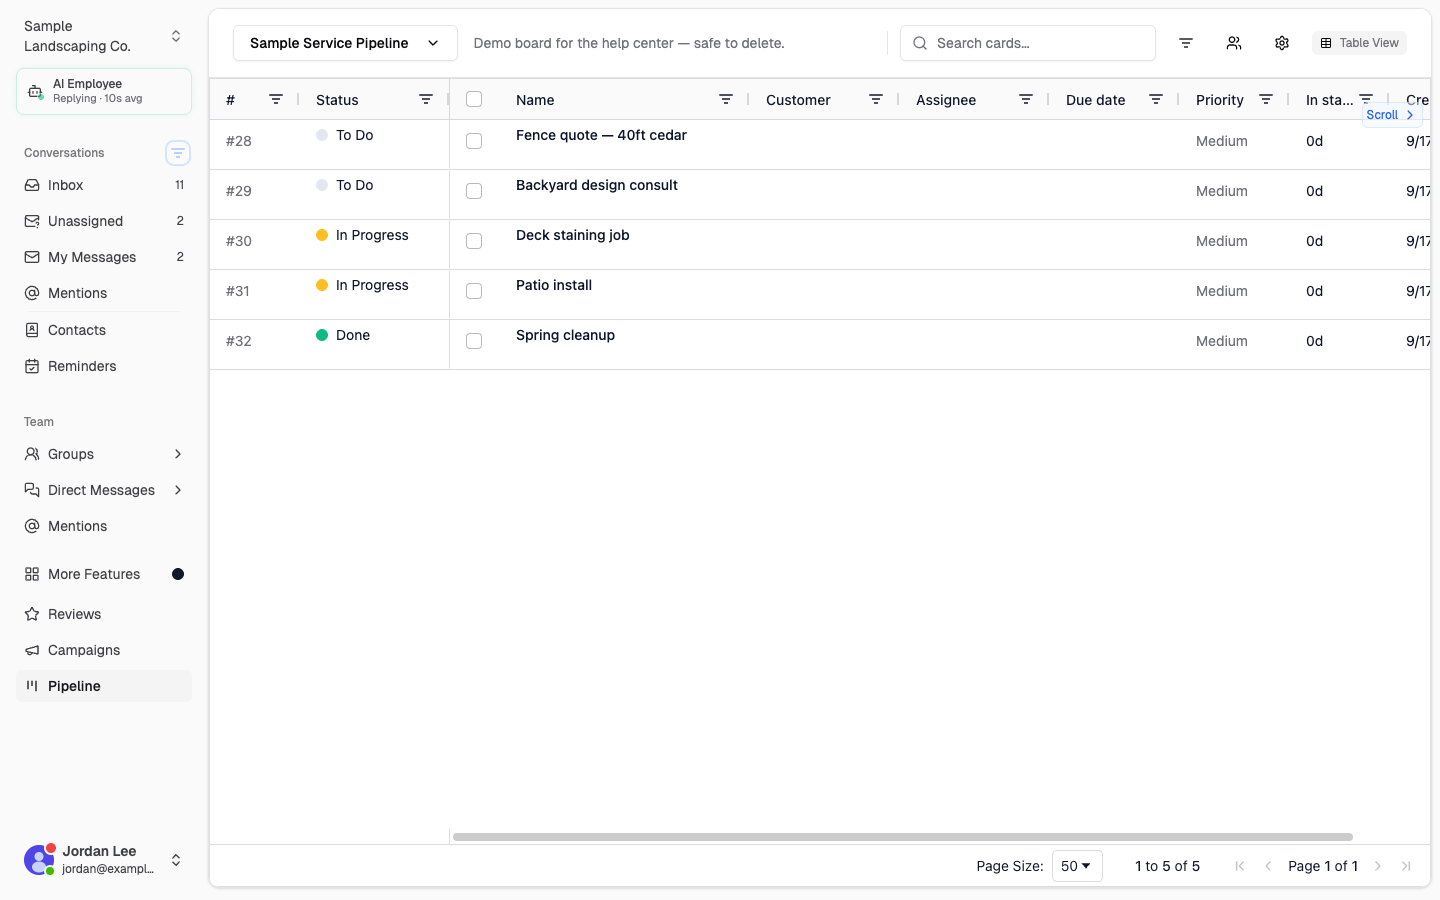
Prefer a list? Switch to Table View using the toggle at the top right (or press ⌘⇧V / Ctrl+Shift+V). The table shows the same cards in rows, and lets you select multiple cards to move or assign them in bulk.
Share a link to a card
Open a card and its web address updates to a shareable link (for example /pipeline/item/1042). Copy the URL from your browser and send it to a teammate — it opens straight to that card.
Cards created from forms
Connect a Chekkit Form to a pipeline and every submission becomes a card — so website enquiries, quote requests, and bookings show up on the board instead of sitting only in Messenger. Cards created this way show a Form badge.
To connect a form:
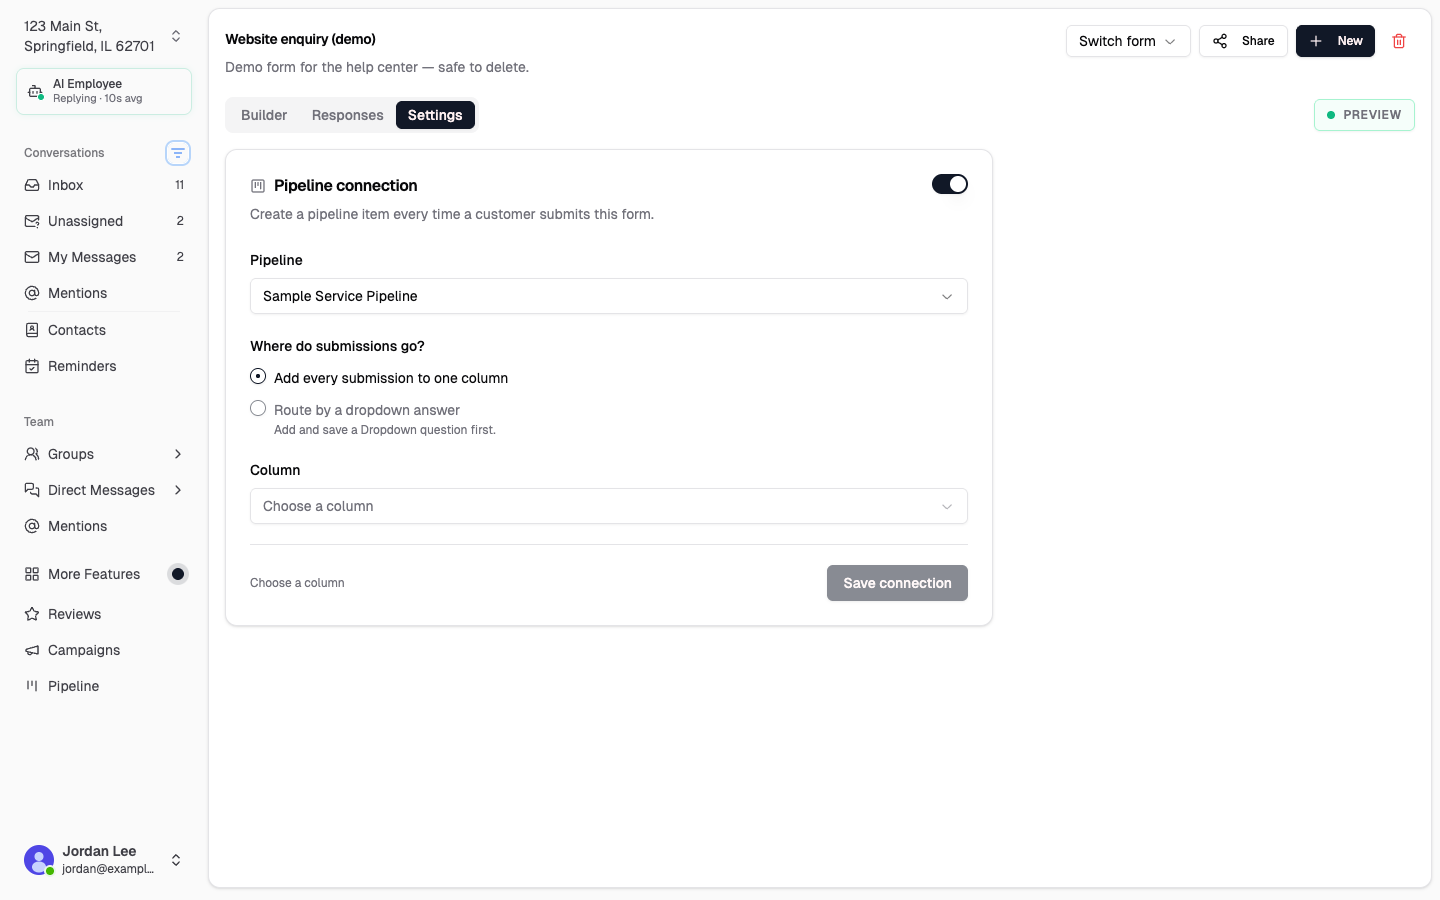
- Open Forms, select the form, and go to the Settings tab.
- Turn on Pipeline connection.
- Choose the pipeline submissions should go to. (Create one first on this Pipeline page if you don’t have one yet.)
- Choose where submissions go:
- Add every submission to one column — pick a single column (for example, New leads). Every submission lands there.
- Route by a dropdown answer — the column is chosen by the customer’s answer to a Dropdown question on the form. Map each option to a column, and pick a fallback column for skipped or unmapped answers so nothing is dropped. You need a saved Dropdown question on the form to use this.
- Click Save connection.
Each submission creates one card. The card is named after the customer (or Form submission if there’s no name yet), the description lists their answers, and the customer is attached so you can text them from the card. Open the card and click View form submission to see the full answers. A column’s item limit never blocks a form card — new leads aren’t dropped because a stage is full.
To stop creating cards, turn Pipeline connection off and confirm Disconnect. New submissions won’t create cards; cards already on the board are kept.
Building and sharing the form itself is covered in Chekkit Forms.
Delete a pipeline
To remove a whole pipeline, open the pipeline name dropdown at the top left and choose Delete Pipeline. This permanently deletes the pipeline and all of its cards, so use it carefully.
Related articles
- Capturing a Lead from the Inbox
- Tracking Workflows (All Work)
- Chekkit Forms
- How do I respond to reviews?
* * *
Hopefully this helps you and your team get the most out of the Pipeline. If you have any difficulties or other questions, contact us at support@chekkit.io!